Adding the Forms extension to your application
This article will step you through the process of adding the Forms extension to your application.
Since the Forms extension will need to both add data to your application, and have a front facing UI, it will need to be included in both the Entity and User Interface diagrams. Additionally, you will also need to make sure the administrators have access to manage the forms.
Entity Diagram
-
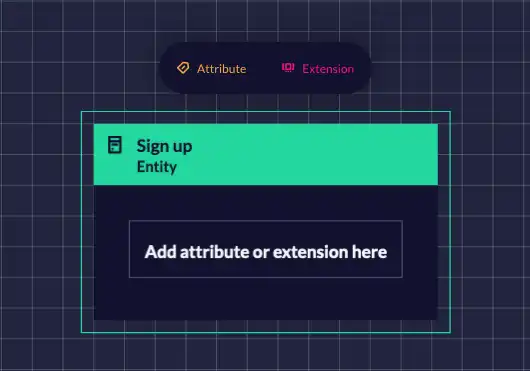
Create an entity which is going to hold your form(s).
You do not need to make an entity for every form you want, just the different types. For example, you may make a Sign-up Form entity which holds forms for different sports, but then have a second entity called Newsletters to hold your newsletter subscription forms. If you have a very simple app, it may be easiest to create an entity called ‘Forms’ which holds all of them for you.
-
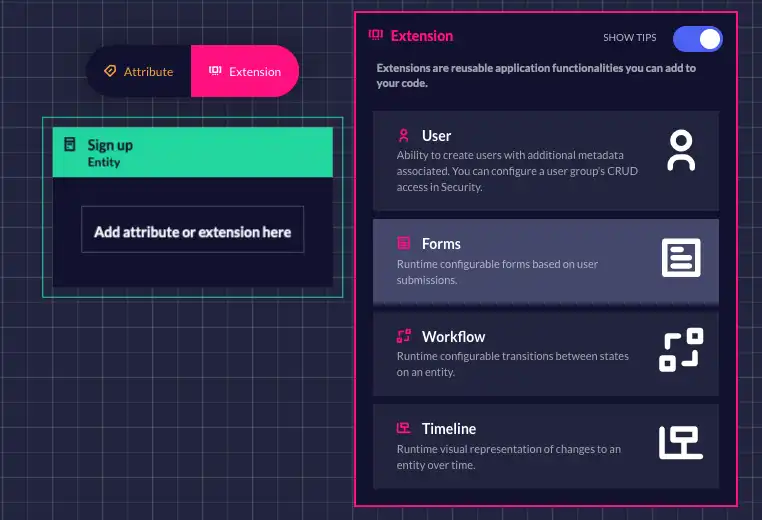
With this entity selected, click on the “Extension” button in the ‘Add items’ panel appearing above the entity, and select “Forms”.
-
You will now see the Forms extension associated with your entity.
User Interface Diagram
- Create a page which is going to hold your form.
-
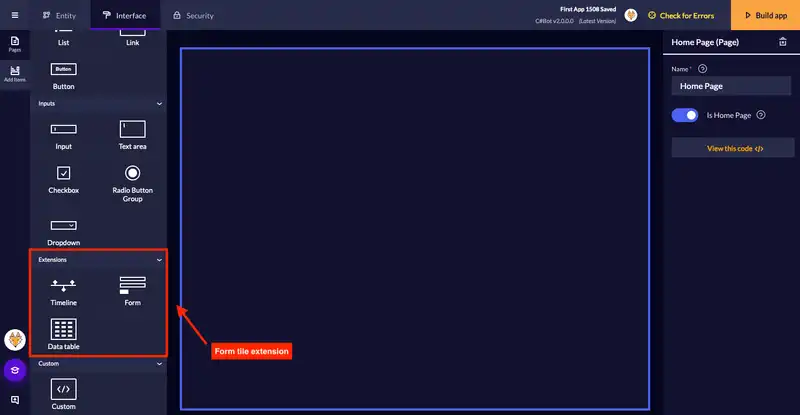
Add the “Form Tile” to your page.
-
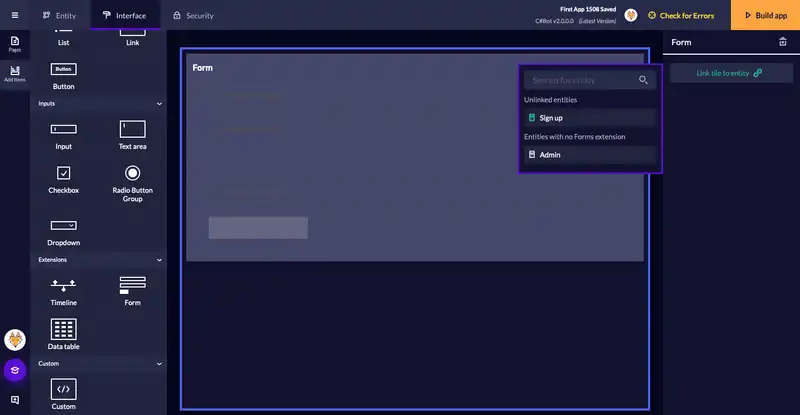
With the tile selected, update the tile properties by linking it to an entity. You can select either an ‘unlinked entity’ which already has the Forms extension in the Entity diagram, or an entity with no Forms extension. Selecting the latter will add the Forms extension to that entity in the entity diagram.


Security Diagram
-
Configure your users to have the appropriate permissions for your form entity. See an example below.
A user with access to the Admin is required to have CRUD access to your Forms entity to be able to build and configure your form(s). This is the Admin user below.


It is important to note that you do not need to give users ‘create’ permission in order for them to be able to fill out the form on the front-end. As long as they have access to the page where the form is displayed, any user is able to create a submission.
Was this article helpful?