Data Migration with SpringBot
As part of SpringBot, custom SQL scripts can be added by the developers to gain more fine-grain control over the underlying database. These scripts can be used to define the desired database state with both schema and data migration scripts.
By default, SpringBot uses Hibernate and Java Persistence API (or JPA) as a bridge between the application and the database. However, you may sometimes require custom database manipulation that is not possible with Hibernate. SQL scripts can be added to allow better control and performance.
This article will walk through how to add your custom SQL scripts and then elevate them in your project.
For this activity we will using the Learning Management System (LMS) - Example project and we will be updating out database with a custom SQL script.
Migration scripts
By default, Spring exposes multiple Hibernate configurations which can be found in the serverside/src/main/resources directory. These files take the form of application-[EnvironmentName].properties. For more details, refer to our article on SpringBot application profiles and configuration.
The most important database-related Hibernate configuration is spring.jpa.hibernate.ddl-auto. This configuration determines what Hibernate should do upon server bootstrapping.
The two most common options are:
| Option | Description |
|---|---|
| update | Update current database, and keep the data. |
| create-drop | Drop the tables in the database, and create new tables |
However, this is just for development or testing purposes. Database migration in production is inherently more risky and requires more care. When performing a production release of a SpringBot application, database migration is performed in a separate process which is run during server bootstrapping. Therefore, spring.jpa.hibernate.ddl-auto=none should be set in the beta or production environments instead.
Liquibase
SpringBot database migration employs Liquibase, an open-source database-independent library for tracking, managing and applying database schema changes.
To help developers to easily set up and use Liquibase in their local environment without installing, we suggest creating a Gradle project. This project can be executed before the actual project to handle database migration.
Setting up a Liquibase project
Creating a Gradle project
To start, you will need a folder which contains a Java project that employs Liquibase for database migration.
- Create a new folder in
serverside/srccalledsql. -
Inside the project, create the following files:
File Name Description Location build.gradle Gradle configuration file serverside/sql/build.gradle gradle.properties Gradle properties file serverside/sql/gradle.properties settings.gradle Gradle settings file serverside/sql/settings.gradle changelog.xml Change log configuration for Liquibase serverside/sql/changelog.xml - If you have previously installed Gradle as part of your environment setup, open a new terminal and run
gradle wrapper --gradle-version=6.4in your newsqldirectory.
This command initialises a new Gradle wrapper so you can run the project with ./gradlew without installing Gradle. Among the initialised file is build.gradle, where we will next add Gradle configuration for our project.
Adding Gradle configuration
-
Insert the following code into your
build.gradle:/** * Gradle Project for the database migration */ plugins { id 'org.liquibase.gradle' version '2.0.1' } repositories { mavenCentral() } dependencies { liquibaseRuntime 'org.liquibase:liquibase-core:3.8.0' // Database liquibaseRuntime 'org.postgresql:postgresql:42.2.5' } def CHANGELOG = "$projectDir/changelog.xml" liquibase { activities { main { changeLogFile CHANGELOG url DATABASE_URL username DATABASE_USERNAME password DATABASE_PASSWORD driver 'org.postgresql.Driver' } } }This adds Liquibase as our project dependencies, and configure its task with
CHANGELOG,DATABASE_URL,DATABASE_USERNAME, andDATABASE_PASSWORDproperties. These properties come from thegradle.propertiesfile, which holds all properties that are relevant to our project. To implement it properly, you will need to include them in there as well. -
Insert the following code into your
gradle.properties:# Dev Database Configuration DATABASE_URL={{your_database_url}} DATABASE_USERNAME={{username}} DATABASE_PASSWORD={{password}} -
Replace
{{your_database_url}},{{username}},{{password}}with your database details as used by your application. If using How do I run my app? you can find these details within thedocker-compose.ymlfile in your root directory .In your docker file, the credentials are defined under the
serversection.server: image: adoptopenjdk:11-jdk-hotspot-bionic working_dir: /usr/src/app/ command: bash -c " sed -i 's/\x0D//' gradlew; ./gradlew bootRun; tail -f /dev/null" environment: DATA_SOURCE_URL: jdbc:postgresql://db:5432/codebots DATA_SOURCE_USERNAME: codebots DATA_SOURCE_PASSWORD: bots SPRING_PROFILES_ACTIVE: dev GRADLE_USER_HOME: /gradle_home profile: devIf you are not using docker, these are the credentials which you defined when you setup your application in Running SpringBot.
Adding changelog configuration
Liquibase requires a changelog file for migration. By default, Liquibase provides a lot of functionality to manage the migration process, such as pre-condition, changeset, and author of the change. For more details, refer to Liquidbase’s documentation.
Follow the steps below to add changelog configuration
-
Insert the following code into your
changelog.xml:<?xml version="1.0" encoding="UTF-8"?> <databaseChangeLog xmlns="http://www.liquibase.org/xml/ns/dbchangelog" xmlns:xsi="http://www.w3.org/2001/XMLSchema-instance" xsi:schemaLocation="http://www.liquibase.org/xml/ns/dbchangelog http://www.liquibase.org/xml/ns/dbchangelog/dbchangelog-3.1.xsd"> <includeAll path="update_scripts"/> </databaseChangeLog>Here the changelog includes all the
*.sqland*.xmlfiles inside theupdate_scriptsdirectory, which are then run in alphabetical order. As best practice, we recommend naming these files in the format ofyyyymmdd_{index}_{description}.sql. By default, Liquibase will run all the*.sqland*.xmlscripts in alphabetical order, which is why use prepend the file name with the current date.
Creating migration scripts
First, create the directory update_scripts in your sql directory. We will be using this folder to contain all of our update script files. The path for your new directory should be serverside/src/sql/update_scripts.
Note: SQL has been used in this example for simplicity however it is recommended to use xml changelogs in a production environment for efficiency and flexibility as it more database agnostic.
Here we will create a custom update SQL script to add a bunch of Books, Articles and Lessons into our app:
Create a new file called 20210104_01_insert_data.sql (but with the currentdate) and insert the following code:
-- Load extension to generate uuid
CREATE EXTENSION IF NOT EXISTS "uuid-ossp";

DO $$
DECLARE
    book_uuid uuid= uuid_generate_v4();
BEGIN

-- Insert Favourites Book
insert into book_entity (id, created, created_by, modified, modified_by, name, summary)  values (book_uuid, now(), null, now(), null, 'Favourites Book', 'Frequently referenced articles for personal use');
-- Insert Articles
insert into article_entity (id, created, created_by, modified, modified_by, content, summary, title, book_id) values (uuid_generate_v4(), now(), uuid_generate_v4(), now(), uuid_generate_v4(), null, 'This article defines TypeScript and how C#Bot applications use it.', 'What is TypeScript', book_uuid);
insert into article_entity (id, created, created_by, modified, modified_by, content, summary, title, book_id) values (uuid_generate_v4(), now(), uuid_generate_v4(), now(), uuid_generate_v4(), null , 'Release versions of the Codebots Products (Platform, Library and Academy)', 'Codebots Versions', book_uuid);
insert into article_entity (id, created, created_by, modified, modified_by, content, summary, title, book_id) values (uuid_generate_v4(), now(), uuid_generate_v4(), now(), uuid_generate_v4(), null, 'A brief overview of what an LMS is and the Codebots LMS example project.', 'Learning Management System (LMS) - Example project', book_uuid);
insert into article_entity (id, created, created_by, modified, modified_by, content, summary, title, book_id) values (uuid_generate_v4(), now(), uuid_generate_v4(), now(), uuid_generate_v4(), null, 'Learn how to run SpringBot', 'Running SpringBot', book_uuid);
insert into article_entity (id, created, created_by, modified, modified_by, content, summary, title, book_id) values (uuid_generate_v4(), now(), uuid_generate_v4(), now(), uuid_generate_v4(), null, 'Setting up your SpringBot development environment for Windows 10.', 'SpringBot: Setting Up Your Development Environment: Windows', book_uuid);
-- Insert Lessons
insert into lesson_entity (id, created, created_by, modified, modified_by, description, difficulty, duration, name, summary) values (uuid_generate_v4(), now(), uuid_generate_v4(), now(), uuid_generate_v4(), null, 0, 30, 'Developing with a codebot', 'How do you work with a codebot to minimist friction and maximise productivity');
insert into lesson_entity (id, created, created_by, modified, modified_by, description, difficulty, duration, name, summary) values (uuid_generate_v4(), now(), uuid_generate_v4(), now(), uuid_generate_v4(), null, 0, 15, 'SpringBot Architecture', 'Learn about how the n-tier structure is applied within SpringBot');
insert into lesson_entity (id, created, created_by, modified, modified_by, description, difficulty, duration, name, summary) values (uuid_generate_v4(), now(), uuid_generate_v4(), now(), uuid_generate_v4(), null, 1, 30, 'SpringBot Dev Environment Setup', 'Setup and run the local SpringBot dev environment');
insert into lesson_entity (id, created, created_by, modified, modified_by, description, difficulty, duration, name, summary) values (uuid_generate_v4(), now(), uuid_generate_v4(), now(), uuid_generate_v4(), null, 0, 15, 'Learning SpringBot Server-Side', 'The technologies which make up SpringBots server-side');
insert into lesson_entity (id, created, created_by, modified, modified_by, description, difficulty, duration, name, summary) values (uuid_generate_v4(), now(), uuid_generate_v4(), now(), uuid_generate_v4(), null, 0, 30, 'SpringBot in Action', 'My first custom SpringBot code');
insert into lesson_entity (id, created, created_by, modified, modified_by, description, difficulty, duration, name, summary) values (uuid_generate_v4(), now(), uuid_generate_v4(), now(), uuid_generate_v4(), null, 2, 45, 'SpringBot Server-Side Custom Code', 'Learn how to write custom code on the server-side of a SpringBot written application');

END$$
Executing migration scripts
Now that we have created the migration scripts, we can run the migration process. In this example we will apply the migration process to the local development database.
-
Open a terminal, navigate to
serverside/sqldirectory and run:./gradlew update
Here update is a Gradle command which will run Liquibase to update the database with the change log configuration we have made previously.
Once done, your database will now be created with the following tables:
databasechangelogdatabasechangeloglock
By default, Liquibase creates two tables: databasechangelog and databasechangeloglock. These two tables are used to record any database changes from the migration scripts we have defined previously. For more details, refer to this Liquidbase update documentation.
If done correctly, you should also have some courses, lessons and articles in your application now.
Run ./gradlew update again and you may notice that there are no database changes. Liquibase keeps a record of all migrations in databasechangelog table preventing the same script from being run more than once. Additionally, all scripts are checked via checksum comparison, and so any scripts which may have been changed will be caught and cause an error.
Invalid SQL
Liquibase will throw errors when trying to perform migrations with invalid SQL.
-
Create a new file called
20210104_02_invalid_sql.sqland insert the following code:ALTER TABLE scales ADD COLUMN description varchar(255); - Open a terminal and run
./gradlew update - You will encounter a Liquibase
MigrationFailedExceptionexception due torelation "scales" does not exist.
When Liquidbase encounters a failed migration, it will not record the failure in databasechangelog. Therefore the script still could be executed after fixing the invalid SQL statement.
Testing migration scripts
To make sure the migration scripts are running correctly, we recommend testing the scripts on a development database before putting it into the update_scripts directory. A useful tool testing migration scripts is PgAdmin.
Note: If you are using Docker, pgAdmin should already be installed.
Creating a connection to the development database
-
After installing and starting PgAdmin, create a connection to your development database by clicking the
Add New Serverin the home page.
-
Click the
Connectiontab and type in your testing database information and clickSave.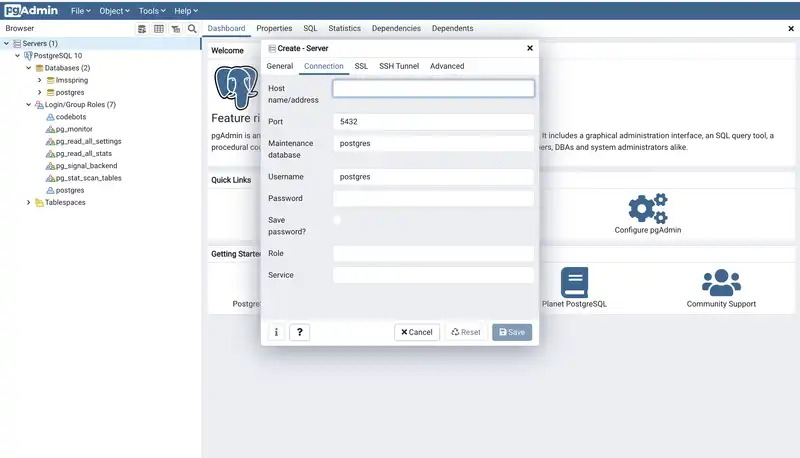
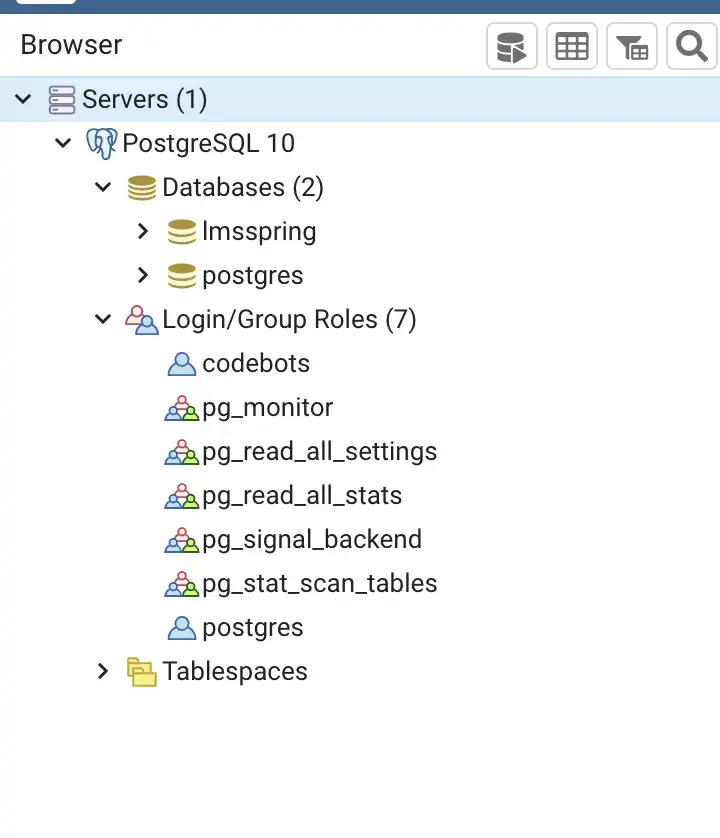
-
If successful, you will see the menu has been updated with your database.


Running SQL Statements
-
Right-click your development database and click
Query Tool...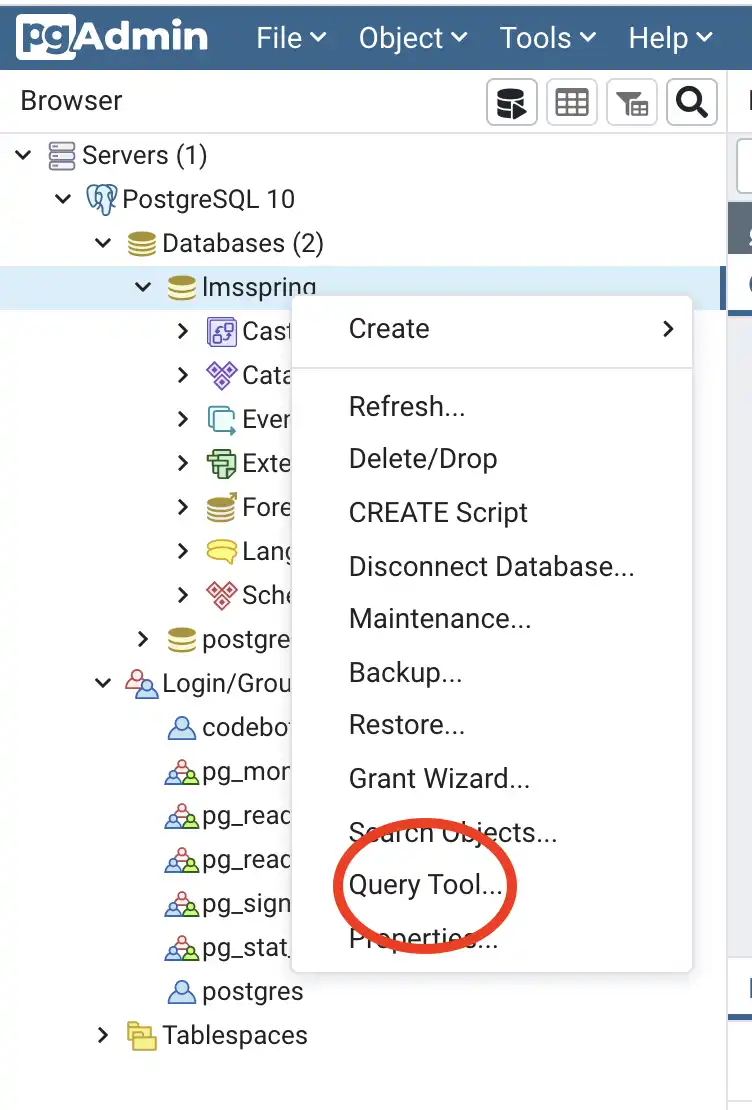
-
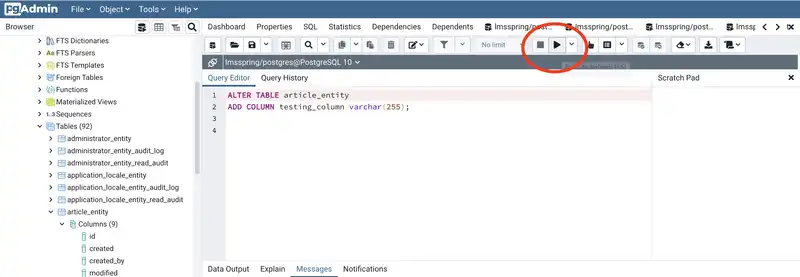
A new SQL editor will open. Copy and paste in the SQL statements you want to run. In this example we will use the following:
ALTER TABLE article_entity ADD COLUMN testing_column varchar(255); -
Click the play button (highlighted in the red circle below) to execute the statements.
- If the script was executed without error, and the changes you want have been made to the database, you can now use the statements in your migration scripts.
-
To make sure you don’t change your app too much, make sure you undo the changes you just made by running:
DROP COLUMN IF EXISTS testing_column

If you run the Liquibase update in the same database after testing in PgAdmin, the Liquibase command will throw errors because you have already run the scripts before in this database. One solution is to backup your database before testing the migrations. Alternatively, manually revert the changes.
Solution
Have a look at the data-migration branch to see the code solution.
What’s next?
Database migration in SpringBot is still in development. It is expected that this functionality will be moved into the bot, automating database migration during the release process.
For the time-being you can use the sql project to handle data migration for your project.
Was this article helpful?