Client/server communication in C#Bot
In this article we are going to go over the basics of fetching data from the server and displaying it on the client-side.
Retrieving Data
There are 2 different ways to fetch data from the server-side. The first is by using REST endpoints created for each entity displayed on the entity model. Details on these endpoints can be viewed by navigating to /api/swagger in your application when it is running.
The second, and arguably more powerful, way of fetching data is by using a GraphQL API implemented by C#Bot. This API allows for fetching data based on a series of conditions, as well as fetching entities related to the entities you have fetched. This article is going to go more into depth on the GraphQL approach.
Setting Up Your Application
In this article we are going to use the following model for the entity diagram:

And the following model for the ui diagram:

Note that the custom tile on this ui model is named Main.
Introduction to GraphQL
GraphQL is a query language that is often used over (but not limited to) a REST transport medium. C#Bot has an interactive query tool called GraphiQL built into the application. This tool is located at /admin/graphiql in your application and requires you to be logged in.
GraphQL is effectively a series of functions that can take arguments and return values which you have requested. It is important to note that GraphQL is simply a specification of a protocol and the implementation of these functions is left to the application itself.
-
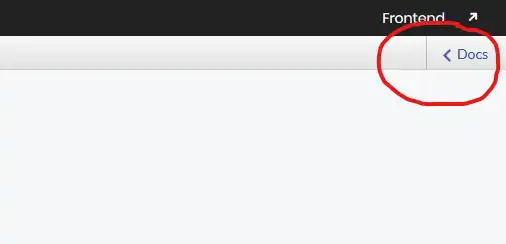
The first thing that we must do is determine what queries there are which can be run. GraphiQL has a built in documentation explorer that can be accessed from the top right hand corner of the interface.
-
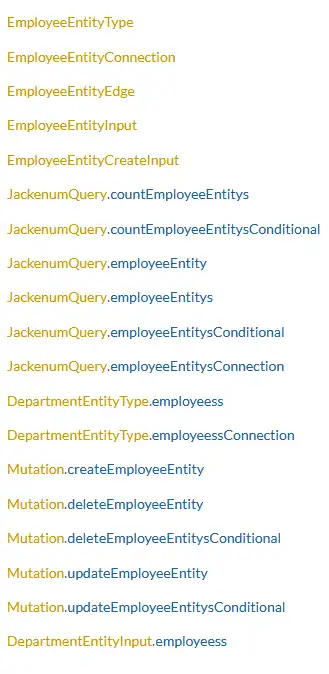
Opening this documentation explorer we can see there are two different root types of functions that can be run: queries and mutations. A query is used for the fetching of data and a mutation is used for creating, updating or deleting data. In the search box of the docs window we can search for ‘employee’ to find what operations we can perform on the employee entity.
-
Here we can see all of the different functions that can be run for entity. For this case, we are going to fetch a list of all employee entities. To do this we must use the
employeeEntitysquery. We can click into the docs for this query to see some more information about it as well.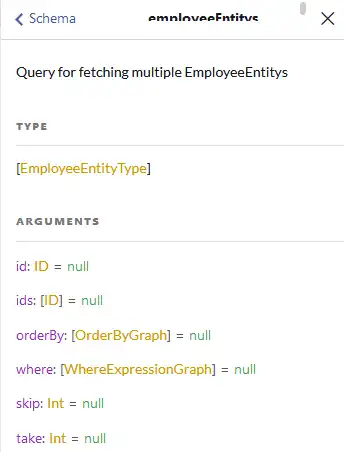
-
We can see from these docs, this function takes several arguments and returns an array of employee entities.
Using this we can write our first query in the query editor. This editor has tab completion based on the types that are specified in the docs and can be invoked using theCtrl+Spacehotkey.# Anything after a hash symbol is a comment query MyFirstQuery { # The name of the query, this can be anything employeeEntitys { # The GraphQl function to run id # The return fields you are requesting email givenName surname } }This query will fetch all employees from the API and return them as JSON like so.
 {
   "data": {
     "employeeEntitys": [
       {
         "id": "614a25f9-2d18-424d-bc93-7dd0fdfd7be0",
         "email": "employee@example.com",
         "givenName": "Jane",
         "surname": "Doe"
       }
     ]
   }
 }
Querying Relations in GraphQL
One of the most powerful features of GraphQL is the ability to query your API as if it was a graph.
Before, when we were exploring the documentation for the query, we could see that for the function we were running it was returning a list of EmployeeEntityType. We can click into this to see what fields on that entity we can fetch.
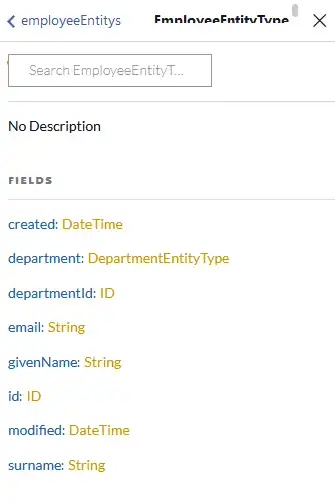
On this we can see some of the fields we fetched before which return primitive types such as strings or ids. However, we can also see there is a field called department that returns a DepartmentEntityType. This field is created because of the relation between employees and departments in the model. We can use this to fetch the department that the employees are in.
query MyFirstQuery {
  employeeEntitys {
    id
    email
    givenName
    surname
    department {         # The department sub query
      id                 # The fields of the department to fetch
      name
    }
  }
}
Which will return the following data:
{
  "data": {
    "employeeEntitys": [
      {
        "id": "614a25f9-2d18-424d-bc93-7dd0fdfd7be0",
        "email": "employee@example.com",
        "givenName": "Jane",
        "surname": "Doe",
        "department": {
          "id": "868c4afb-06f0-45bb-842b-b958a767f32e",
          "name": "Accounting"
        }
      }
    ]
  }
}
This means we can now fetch multiple levels of data without having to write any custom server-side code.
Query Arguments
If we could only fetch all the data from our API then this would not be very useful, so that’s why we can put arguments into our queries to restrict the data that is returned. We can see the list of arguments that are accepted in the documentation for the query that we fetched before.
In this case we are going to write a query to return the first 10 employees in alphabetical order by their surname and given name.
-
First up we have to modify our query a little bit.
query MyFirstQuery($take:Int, $orderBy: [OrderByGraph]) { # Now the query takes arguments employeeEntitys(take: $take, orderBy: $orderBy) { # Use the arguments in the function id email givenName surname department { id name } } } -
We have now made the query take 2 arguments that can be provided to the query, and those arguments are going to be used for the data function. To add the variables we must expand the ‘Query Variables’ tab below the editor and type the following JSON:
{ "take": 10, "orderBy": [ { "path": "surname", "descending": true }, { "path": "givenName", "descending": true } ] } -
So now your query window will look like this:
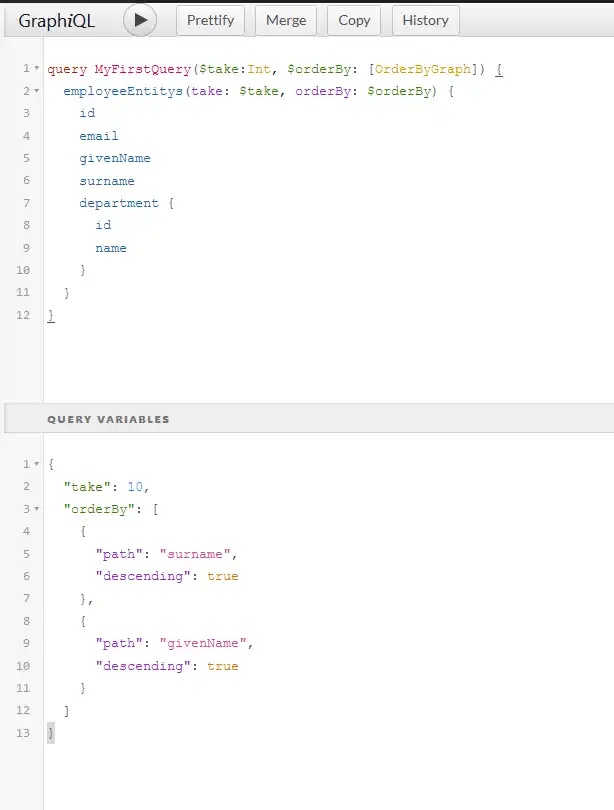
You can run this query and now the variables that were provided will be used in the query and fetch the data correctly.
Using the Data in React
Now we have an idea on how the GraphQL works, we can now take to implementing it in react. For the common tasks of fetching entities, we already have some functions that implement this for us already.
In clientside/src/Views/Tiles/MainTile.tsx we can place the following code:
-
First we are going to add some imports to the top of the file:
// % protected region % [Add any extra imports here] on begin import { EmployeeEntity } from 'Models/Entities'; import { action, observable } from 'mobx'; // % protected region % [Add any extra imports here] end -
Secondly we can add some class methods for the fetching of the data:
 // % protected region % [Add class properties here] on begin
 @observable
 private status: 'loading' | 'error' | 'done' = 'loading';

 @observable
 private employees: EmployeeEntity[] = [];

 public componentDidMount(): void {
     EmployeeEntity.fetch<EmployeeEntity>()
         .then(this.onDone)
         .catch(this.onError);
 }

 @action
 public onDone = (employees: EmployeeEntity[]) => {
     this.employees = [...employees];
     this.status = 'done';
 }

 @action
 public onError = (error: any) => {
     console.error(error);
     this.status = 'error';
 }
 // % protected region % [Add class properties here] end
Going through these fields one by one:
-
status- The status of the http request that we are sending. -
employees- The list to store the fetched employees in after we have received the data. -
componentDidMount- This function is a react lifecycle method that occurs when the component is first mounted to the page. We can use this to fetch the data when the tile is first displayed. -
onDone- The callback function for when we have fetched the data. -
onError- The callback function in the case that fetching the data failed.
-
-
Finally we can do the implementation of the render function:
 public render() {
     let contents = null;

     // % protected region % [Override contents here] on begin
     // We deal with the possible states of the request in a switch statement
     switch (this.status) {
         case 'loading':
             contents = 'Loading....';
             break;
         case 'error':
             contents = 'Something went wrong with the request';
             break;
         case 'done':
             contents = (
                 <>
                     <h3>Employees</h3>
                     <div>
                         {this.employees.map(e => (
                             <div>{e.givenName} {e.surname}</div>
                         ))}
                     </div>
                 </>
             );
             break;
     }
     // % protected region % [Override contents here] end

     return contents;
 }
We can see that we use the status field in a switch statement to change the contents of the tile based on what the network request is doing.
Fetching data with conditions
Now that we have a basic fetch done for the application we can perform some of the more complex operations we did in GraphQL earlier. Under the hood this fetch function is actually using the same employeeEntitys GraphQL function we were using before to fetch data, so it can be passed the same arguments. This can be done by passing a JSON object of variables to the first argument of the fetch function.
So to perform the same query as before where we fetch the first 10 employees in the order of their surname then given name we can can alter the componentDidMount function.
public componentDidMount(): void {
    EmployeeEntity.fetch<EmployeeEntity>({
        "take": 10,
        "orderBy": [
            {
                "path": "surname",
                "descending": true
            },
            {
                "path": "givenName",
                "descending": true
            }
        ]
    })
        .then(this.onDone)
        .catch(this.onError);
}
These variables are then passed through to the underlying graphql function for fetching data. These arguments are typed in the typescript to validate that only the correct arguments are being passed though.
Fetching Relations
There are also times where we want to fetch relationships as well. This can be done as a part of the second argument of the fetch function. This argument is a string that is appended to the body of the GraphQL query.
If we wanted to fetch the department the employee is in then we could copy the department section from the GraphQL query we made before and use it for the second argument.
public componentDidMount(): void {
    EmployeeEntity.fetch<EmployeeEntity>(undefined, `
        department {
            id
            name
        }
    `)
        .then(this.onDone)
        .catch(this.onError);
}
Note that both parameters can be used at the same time to use all the functionality.
Default Configuration
The query run by fetch will have several default fields. These are all of the attributes present on the model as well as some of the relationships. To see what fields are already provided, you can take a look at the defaultExpands in the client-side model.
For example in clientside/src/Models/Entities/EmployeeEntity.tsx you can see the department is already fetched by default:
// % protected region % [Customize Default Expands here] off begin
public defaultExpands = `
    department {
        ${Models.DepartmentEntity.getAttributes().join('\n')}
    }
`;
// % protected region % [Customize Default Expands here] end
The data in this string can be changed by enabling the protected region.
Running Raw GraphQL
In some cases we do not want some more control over the query we are running. This can be done by invoking the query directly. To call the GraphQL API we use a library called Apollo. We can replace our implementation of the data fetch with this if we need to.
-
First we will need to update our imports:
// % protected region % [Add any extra imports here] on begin import { EmployeeEntity, IEmployeeEntityAttributes } from 'Models/Entities'; import { action, observable } from 'mobx'; import { store } from 'Models/Store' import { gql } from 'apollo-boost'; // % protected region % [Add any extra imports here] end -
Now we can call use the apollo client to call the GraphQL API directly in
componentDidMount. The rest of the code for the tile can remain unchanged:public componentDidMount(): void { store.apolloClient.query({ query: gql` query MyFirstQuery($take:Int, $orderBy: [OrderByGraph]) { employeeEntitys(take: $take, orderBy: $orderBy) { id email givenName surname department { id name } } } `, variables: { "take": 10, "orderBy": [ { "path": "surname", "descending": true }, { "path": "givenName", "descending": true } ] } }) .then(result => result.data.employeeEntitys.map((e: IEmployeeEntityAttributes) => new EmployeeEntity(e))) .then(this.onDone) .catch(this.onError); } -
This will now run the exact same GraphQL we composed by hand before.
Was this article helpful?